An elk hide and an Ash Tree can create a lifetime of memories.
My father in law Jim is a crafty guy who spends much of his time these days making pottery or woodworking when he isn’t hanging out at a cross country ski area near his home. He has spent a lifetime in the mountains much of which was spent pressing snowshoes into soft snow or sliding cross country skis along a remote trail in the quiet north woods so it wasn’t a surprise when he wanted to give snowshoes to my son Kaden.
When I shot a five point bull he asked me how hard it would be to make rawhide. It was just a matter of soaking it in a solution made from wood ashes and water and scraping the hair off.
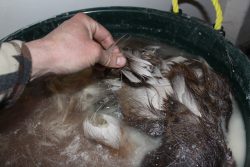
The author began the rawhide process by soaking the elk hide in a solution of hydrated lime (wood ashes may also be used) and water with a ratio of two pounds lime per 10 gallons water (note: this photo is a deer hide)
Then he asked me to send him a “big piece of hide”. His idea was to make a pair of snowshoes for Kaden. The result was a work of art that will be cherished for a lifetime; snowshoes made by Jim who Kaden calls “Papa” strung with elk hide from “Dad”.
The hair was scraped off using a fleshing knife. The full grain was left on the hide and only hair was removed. The hide was thoroughly rinsed.
Shooting bulls and fleshing hides is usually the type of stories I write about because that’s what I know how to do. Making snowshoes is a different skill that I don’t possess so the how to part of this story was relayed from Papa.
Here’s how Papa did it:
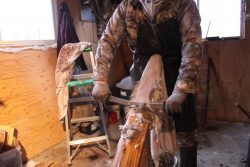
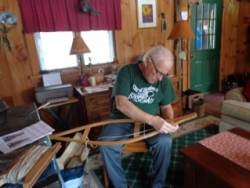
First, the big piece of hide I sent him needed to be made into rawhide strips suitable for snowshoe building. To accomplish this Jim stretched the hide out inside a frame and laced the hide until it was taught.
A sharp knife and patience were needed to cut the rawhide into a consistently sized strip.
The strips varied in width from 1/4″ to 1/2″ depending on where they would be used. Toes and tips were narrower and foot pads were wider.
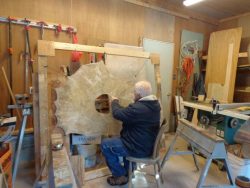
Jim stretched the hide as shown here which allowed him to cut strips the width and length he needed in a circle that began with a single hole in the center of the hide.
It didn’t take long before the hole in the center of the stretched hide was able to produce a strip of rawhide 7 feet long with a single pass around the inside of the hole.
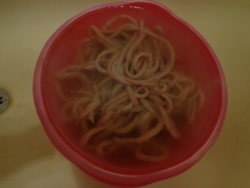
Rawhide Strips soaked in a bucket to re-hydrate
Cuts were made and strips collected by wrapping the strips on a board. This was important to keep the rawhide organized. As the strips were cut the rawhide began to dry naturally requiring that it be soaked in water and then wrung out. With the strips soaked until they regained the original loose characteristics.
The strips needed to be wrung out after they were re-hydrated and wetted throughout the process of stringing the shoes too in order to maintain pliability.
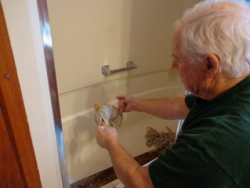
The rawhide had to be stretched and wrung out after rehydrating
Jim did this part of the process in his bathtub using old fashioned elbow grease and persistence. Once the strips were wrung and stretched they were stored frozen inside plastic baggies.
The rawhide will rot if kept moist in a warm environment.
Papa did the lacing of the snowshoes in his living room. No special tools were necessary.
Jim is a hobby wood worker and used an Ash tree collected near his house which he calls “Cadyville Ash” to make the frames for the snowshoes.
With the frames complete Jim started by lacing the ends of the shoes first.
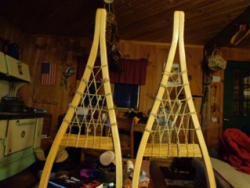
The tips of the snowshoes were laced first.
The foot pad requires a lot of work and careful weaving to attain the classic snowshoe pattern.
Keeping the rawhide lacing tight throughout the process is important to ensure that they remain tight after they dry later in the process. Jim used a reference book about lacing snowshoes for this critical part of the lacing process.
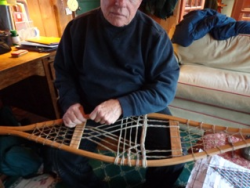
The weaving process for the foot pad is the most complicated part about making snowshoes.
The rawhide was allowed to dry and as it shrank the snowshoes solidified. The next step required a couple coats of spar varnish and Jim said that they must be re-varnished every year.
After several days of drying the snowshoes were tested for integrity and shipped.
 When the snowshoes arrived in the mail all we needed to do was add bindings and find snow to tromp around in. For a young boy who loves the outdoors that was the best part! Kaden loves his snowshoes but probably doesn’t realize just how special they are yet. He will someday but for now, they just provide hours of winter fun in the snow.
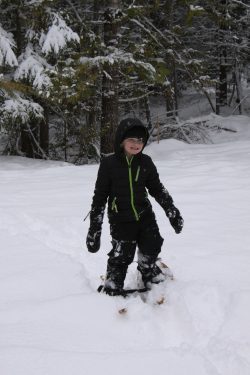
The authors son making tracks in the snow with snowshoes made from the hide of an elk that the author shot and ash frames crafted by Jim King aka “Papa”
He is reminded often that they were made for him so that he can hike in the mountains. “I know!” He says as he makes tracks in the snow just like Papa.
Try saving your hides this season and use them to make something it might just last a lifetime!