 Montana’s general big game season is rapidly approaching; time to get ready. Besides knives, ammunition, clothing, back-packs, boots and belts, one of the most important items that hunters should make sure is ready for opening day is your rifle’s scope. Most big game rifles are equipped with some type of telescopic sight and there are a few basic procedures that will help them function properly and reliably.
 The following is a true story. A few years back a friend of mine purchased a new scope for his rifle and he asked me to help him sight it in. The scope was mounted and “bore sighted” at the sporting goods store where he purchased the optic. We went to a local range and when he uncased his gun, I could see there was a real problem. I think the chap that mounted the scope must have been standing on his head. The scope was mounted 90° to the left; in other words, the elevation turret was on the horizontal plane and the windage turret was on top. The dude lied when he told my friend that the scope had been “bore sighted,” yeah right. Fortunately, my friend had not replaced the rings which were held together with slotted screws. I was able to loosen the screws, rotate the scope, get good alignment of the reticle with the bore, and tighten everything back down. I got his rifle zeroed in at 100 yards and on the way home he stopped at my home where I properly torqued the ring screws. So much for store mounting and bore sighting.
 Now let’s look at what should be done with the mounting of any riflescope. These procedures also apply to scopes that have been on a rifle for years; in fact, it’s good practice to check all the mounting fasteners every year and go to the range and check your rifle’s zero.
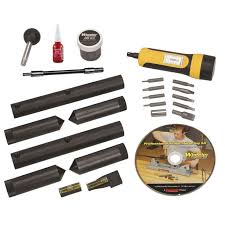
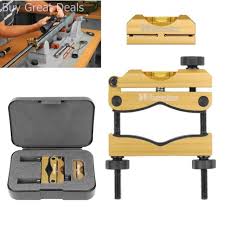
The tools needed for installation are few, but they need to be quality. A torque wrench that can be set in inch/pounds, various screwdrivers and torx or hex drivers are also necessary. Most rings you buy today will have torx fasteners. I also strongly recommend you have the proper tools for “lapping” the scope rings. Now onto the mounting process.
 First, I suggest that all the parts be cleaned and degreased, lacquer thinner is a great solvent for this process and it dries very, very, quickly. Be sure to use it in a well-ventilated area. Next, mount the bases; some rifles will come with the bases machined into the receiver (e.g. Ruger), others will have bases pre-mounted at the factory. If your gun has pre-mounted bases, I suggest that you remove them and clean the mounting hardware. When you mount the bases, I also suggest that you use some form of thread locker such as blue Loctite®. DON’T use red Loctite®, it creates a permanent bond. Torque the bases as recommended, usually about 30 in/lb. Next mount the rings to the bases, again properly torquing. Now separate the rings. At this time the rings should be “lapped;” this is the process of evening the internal surface of the rings which will increase the surface area that holds the scope. Two items; first, be sure to keep the rings in the same orientation they were in when you removed them. Secondly, don’t overdue the lapping; just get a nice, even finish on the inside of the rings.
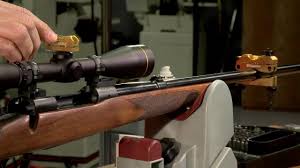
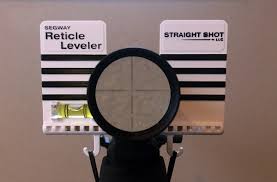
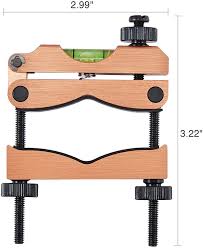
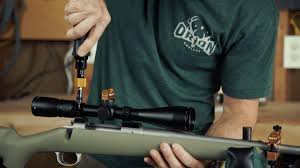
 Now you can begin the scope mounting procedure. Place the scope in the rings and tighten the screws enough to hold the optic securely, but not so tight that you cannot rotate it or move it fore and aft. Have the gun’s user mount the rifle and adjust the scope forward or backward until the user can mount the gun and get a full field of view. After getting the eye relief set it’s time to square the reticle to the barrel. This can be done several ways, the most common being just looking through the scope and aligning the vertical axis with the bore. There are several leveling units that work by aligning the elevation turret to the bore; these are fairly useful, but not all reticles are perfectly aligned with the turrets, so be sure to “eyeball” the alignment. Now torque the ring screws to the recommended setting and again check the reticle/bore alignment.
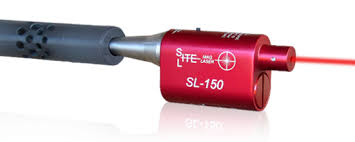 Finally, I suggest “bore sighting” the gun. This will help you get on target faster. If you have a bolt action rifle, stabilize the rifle, remove the bolt, look down the bore and align the gun on a small object at least 25 yards away. Be sure the gun is locked in place, then look through the scope and adjust the reticle until the crosshairs intersect the object sighted through the bore. Now, go to the range and sight in the scope to your chosen zero. There are other ways to boresight a scope some of which are lasers or tools that have a grid that mounts on the barrel and the scope’s reticle is aligned to the center of the grid. Of course, these tools cost a fair amount.
 All these procedures might sound a bit complicated; they really aren’t. If you follow the process outlined above, it will take about an hour or so to completed the mounting. Don’t be in a hurry; remember accuracy is what you are after.
 If you are a bit intimidated by this process or don’t have the necessary tools, there is another alternative. Have a competent gunsmith or armorer mount your scope. Be sure that they will perform all the steps, especially lapping the rings and aligning the reticle, and torquing the screws to the proper settings. The cost to have your scope mounted by a professional will probably cost between 40 and 50 dollars. When that 6-point bull wanders out of the thicket you’ll be happy you spent the money.
Be safe and good shooting.
Colonel Smoothbore