
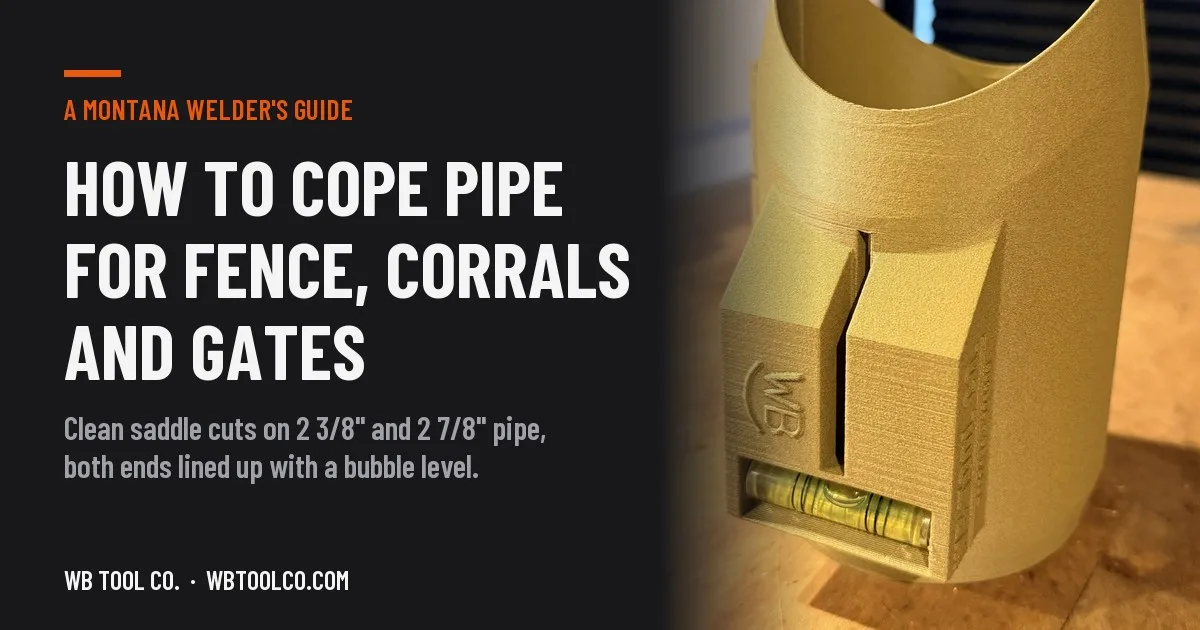
If you’ve built pipe fence in Montana, you’ve built it out of 2 3/8″ and 2 7/8″ pipe. It’s what the corrals, alleys, gates and H-braces in ranch country are made of, and every place a rail meets a post, somebody has to cope it.
A good cope is the difference between a joint you weld once and a joint you fill, grind and fill again. This guide covers how to lay out a clean saddle cut on round pipe, the mistakes that cost the most time, and the tool we built in Stevensville to take the guesswork out of it.
What “coping” a pipe means
Coping (also called saddling or fishmouthing) is cutting the end of one pipe so it fits tight against the round side of another. The pipe you cut is the branch. The pipe it meets is the header. In a fence, the rail is usually the branch and the post is the header.
Cut it square and you’re welding across a gap that opens wider the farther you go around the pipe. Cope it right and the two pipes touch all the way around, so the root is even and the bead goes in once.
The three numbers you need
Every cope comes down to three measurements:
- The branch pipe’s outside diameter (OD), the pipe you’re cutting.
- The header pipe’s OD, the pipe it lands on.
- The angle between them. 90° is a straight tee.
The most common mistake is using the nominal size instead of the OD. “2-inch pipe” is not 2″ across. Here’s the chart worth taping to the shop wall:
| Nominal pipe size | Outside diameter |
|---|---|
| 3/4″ | 1.050″ |
| 1″ | 1.315″ |
| 1 1/4″ | 1.660″ |
| 1 1/2″ | 1.900″ |
| 2″ | 2.375″ (2 3/8″) |
| 2 1/2″ | 2.875″ (2 7/8″) |
| 3″ | 3.500″ |
| 4″ | 4.500″ |
That’s why fence builders talk in 2 3/8 and 2 7/8: they’re naming the OD, which is the number that matters for the cut.
The old ways to lay out a cope
- Eyeball and grinder. Fast for one joint, slow for forty. Every one fits a little different.
- Paper wraps. Print a template, cut it out, tape it on. Works until it’s windy, wet or covered in mill scale, which in Montana is most days.
- Hole saw or notcher. Good in the shop, hard to haul to the middle of a pasture, and limited by the saws you own.
- Math and a flexible rule. Accurate if you have the time. Most people building fence don’t.
The weak spot in all of them is lining the cut up. Cope both ends of a rail and if the two cuts are rotated even a few degrees from each other, the rail won’t sit flat between two posts.
A coping marker built by a working welder
WB Tool Co. makes a hinged pipe coping marker, designed by a working welder and fabricator and 3D-printed to order in Montana. You pick your two pipe sizes and the angle, and the marker is drawn to those exact outside diameters.
How it works:
- Square-cut the end of the branch pipe.
- Open the hinge and close the marker around the branch.
- Roll it until the bubble in the built-in level centres, then scribe a centre line through the slot.
- Trace the curved edge onto the pipe with soapstone.
- Do the other end the same way. With the bubble centred on both ends, the two copes line up.
- Cut to the line.
- At fit-up, line the scribed centre line up with your mark on the header.
That level is the part that matters most on fence and corral work. We ran one for a full day of copes in the field: no complaints, and the level makes inline copes on both ends of a rail easy, which is exactly the job that eats time when you’re building panels.
What it’s made of
The marker is printed in ASA-CF, a carbon-fibre reinforced ASA. The bore is 1/32″ larger than the pipe’s OD, so it slides over pipe with mill scale on it instead of binding. It’s plastic, so let fresh welds and torch cuts cool before it touches the pipe.
Sizes and prices
- 2 3/8 on 2 3/8, 2 7/8 on 2 7/8, or 2 3/8 on 2 7/8: $20
- Any other size, from 1 1/16″ to 8 5/8″ OD: $25
- A cope at an angle other than 90° (45° to 89°, whole degrees): $5 more
- Your initials on the marker: $5 more
The branch has to be the same size as the header or smaller, with one exception built for fence work: 2 7/8 coped onto 2 3/8.
Every marker is made to order and ships in 7 to 10 business days to US addresses, Puerto Rico included. Shipping is the carrier’s rate to your ZIP, shown in the cart before you pay.
Build your coping marker at wbtoolco.com →
Tips for cleaner copes on ranch fence
- Measure the pipe you actually have. Used drill pipe and new pipe can both run a hair off nominal. Put calipers on it.
- Mark the header too. A soapstone line on the post where the rail’s centre line lands makes fit-up one move.
- Cope both ends before you cut to length. Lay out both ends, then measure between the copes.
- Keep the marker off hot steel. Lay out a batch of rails before you light the torch, not between cuts.
- Gates and braces at an angle. Diagonal braces are where a fixed-angle marker earns its keep: order it at the angle you’ll repeat.
Frequently asked questions
What’s the most common pipe size for ranch fence? 2 3/8″ and 2 7/8″ OD, often used drill pipe. Those are the two standard sizes for the WB Tool Co. marker.
Can I cope 2 7/8 pipe onto a 2 3/8 post? Yes. On that marker the cope follows the 2 3/8″ pipe where the two touch and stops at its centre line where the 2 7/8″ is wider.
What angles can it do? 45° to 90°, in whole degrees. 90° is a straight tee.
Does it have magnets? No. It closes on its hinge around the pipe.
What if it’s not what I expected? Email the address on the store, and we’ll answer you ourselves.
WB Tool Co. designs and 3D-prints tools for the trades in Montana, with offices in Stevensville, Montana and Salem, Oregon. See every tool at wbtoolco.com.
Montana's outdoor week, in your inbox at 7am Friday.