
The weather is warm, the trails are calling, and unfortunately, the ticks are waiting. If you spend any time hiking, gardening, or just walking through tall grass this season, finding one of these tiny hitchhikers on yourself, a family member, or a pet is almost a rite of passage.
Discovering a tick embedded in your skin can bring on an immediate wave of panic, but removing it doesn’t have to be complicated. The golden rule is speed and precision: the sooner you remove it, the lower the chance of transmitting illness.
Here is your straightforward, step-by-step refresher on exactly how to handle a tick discovery safely and effectively.
How to Remove a Tick Correctly
Forget the old wives’ tales. Do not use a burnt match, petroleum jelly, rubbing alcohol, or nail polish to “suffocate” the tick. These methods can actually irritate the tick, causing it to regurgitate fluids back into your bloodstream, which increases your risk of infection.
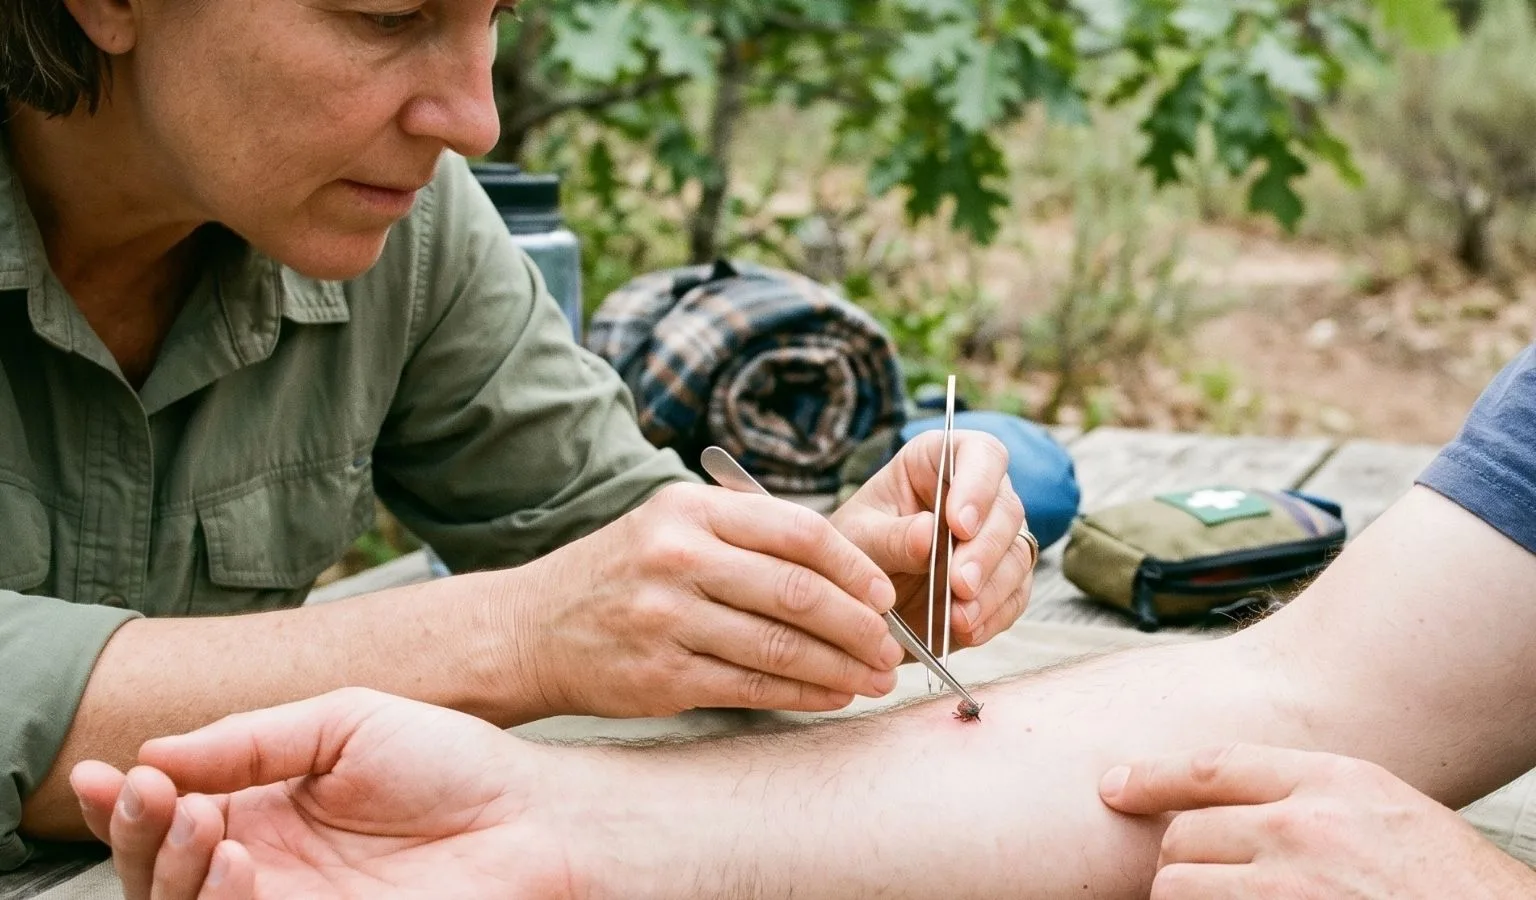
Stick to the medically approved, standard tool: a simple pair of fine-tipped tweezers.

1.Grasp the tick close to the skin:
Step 1.
Use fine-tipped tweezers to grab the tick as close to your skin’s surface as possible. Your goal is to grasp it by the mouthparts, not the plump body.
2.Pull straight up with steady pressure:
Step 2.
Pull upward with a steady, even motion. Do not twist, jerk, or wiggle the tick. Twisting can cause the mouthparts to break off and remain embedded in the skin.
3.Clean the bite area thoroughly:
Step 3.
Once the tick is out, wash the bite site and your hands completely with rubbing alcohol, an iodine scrub, or soap and water.
4.Dispose of or save the tick:
Step 4.
Never crush a tick with your fingers. Dispose of it by putting it in alcohol, placing it in a sealed bag/container, wrapping it tightly in tape, or flushing it down the toilet. If you live in a high-risk Lyme disease area, consider saving it in a sealed baggie to show a doctor if you develop symptoms.
What to Do If the Mouthparts Break Off
If you pull the tick out and its mouthparts break off and stay in your skin, don’t panic. The infectious part of the tick is in its body, which you have already removed.
- Try to remove the remaining pieces gently with clean tweezers.
- If you cannot remove them easily, leave them alone and let the skin heal. Digging into the skin will only increase your risk of a secondary bacterial infection. Your body will naturally expel the remaining fragments over time, much like a splinter.
Watch the Visual Walkthrough
If you want a quick visual demonstration to keep fresh in your mind before you hit the trails, check out this excellent, quick video guide:
When to See a Doctor
Keep a close eye on the bite area over the next 30 days. You should reach out to a healthcare professional if you experience any of the following symptoms:
- A rash: Look out for an expanding red ring (often called a “bullseye” rash), or any unusual rash spreading from the bite.
- Flu-like symptoms: Fever, chills, fatigue, body aches, headaches, or swollen lymph nodes.
- Local infection: Increased redness, warmth, swelling, or oozing at the site of the bite.
A quick check after every outdoor adventure and a reliable pair of tweezers in your first-aid kit are all you need to stay safe and enjoy the season confidently.
Source info:
Video Guide: For a quick, 30-second visual demonstration of the removal process, watch the Tick Removal Video Refresher on YouTube.
Medical Guidelines: The step-by-step removal protocol, tool recommendations, and symptom-monitoring timeline strictly align with the standard public health guidelines established by the Centers for Disease Control and Prevention (CDC).
Montana's outdoor week, in your inbox at 7am Friday.